Introduction
When integrating with ServiceLink 360 and using Solaria 8.00 or higher, you will be able to enter new jobs directly in ServiceLink. You can create new blank jobs, copy jobs and cancel jobs in ServiceLink. Editing of existing jobs is not allowed yet.
Setup
You must do the following before you can enter new jobs in ServiceLink:
1. In ServiceLink, turn on the new company setting named ServiceLink Controls Next Job Number.
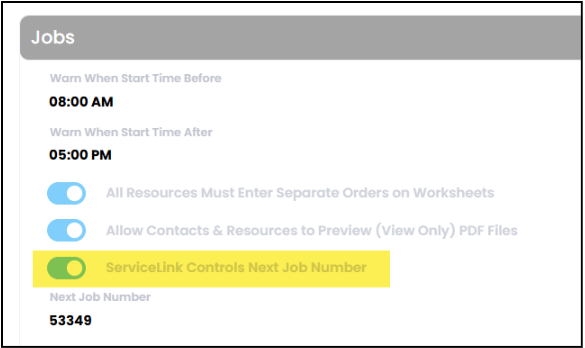
2. Close and re-open Solaria to pull down this new setting from ServiceLink. When adding new jobs from Solaria, it will ask ServiceLink for the next job number to use.
3. Be sure your Solaria Services or auto fetch is fetching every 5 minutes to keep Solaria updated.
4. Turn on the “Create” access to the “Jobs” privilege for your user role in ServiceLink.
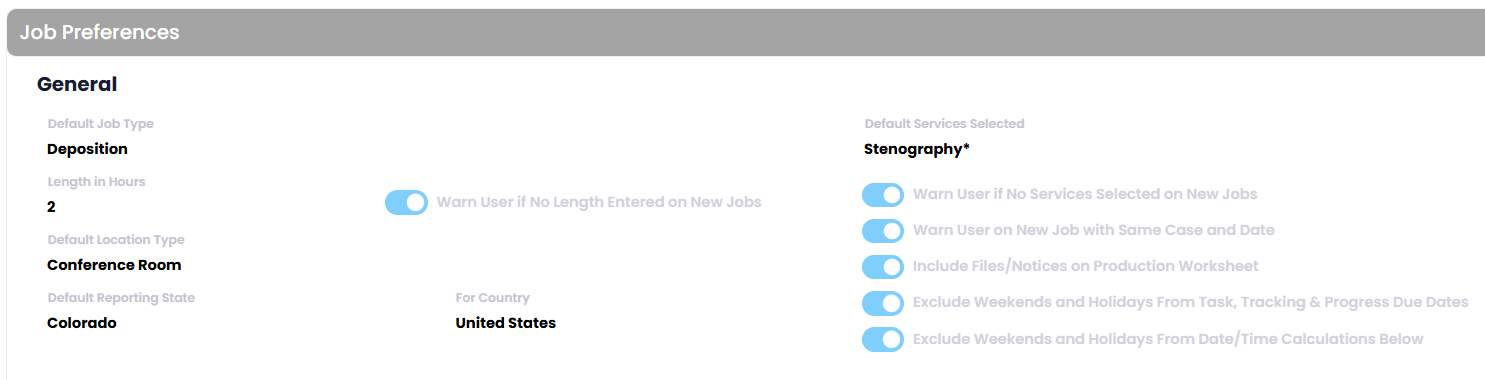
5. The System Preferences for Solaria that apply to company-wide settings in ServiceLink will be automatically sent to ServiceLink; however, some settings are set up for each division in ServiceLink instead of company-wide. Review the division settings for each division for the defaults to use when entering new jobs. These should match your Solaria defaults.
Job Preferences
- Default Job Type
- Length in Hours
- Warn User if No Length Entered
- Default Location Type
- Default Reporting State and Country
- Default Services Selected
- Warn User if No Services Selected on New Jobs
- Warn User on New Job with Same Case and Date
- Exclude Weekends and Holidays From Task, Tracking & Progress Due Dates.
Order Preferences
- Default Delivery Type
- Exclude Weekends and Holidays (for delivery type)

Entering Jobs
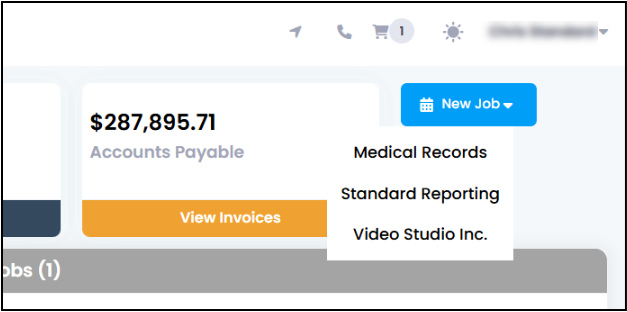
You will see New Job buttons on the dashboard, calendar, job list and job detail pages. If you have more than one division, clicking on it will pop up with a menu to select a division for the new job.
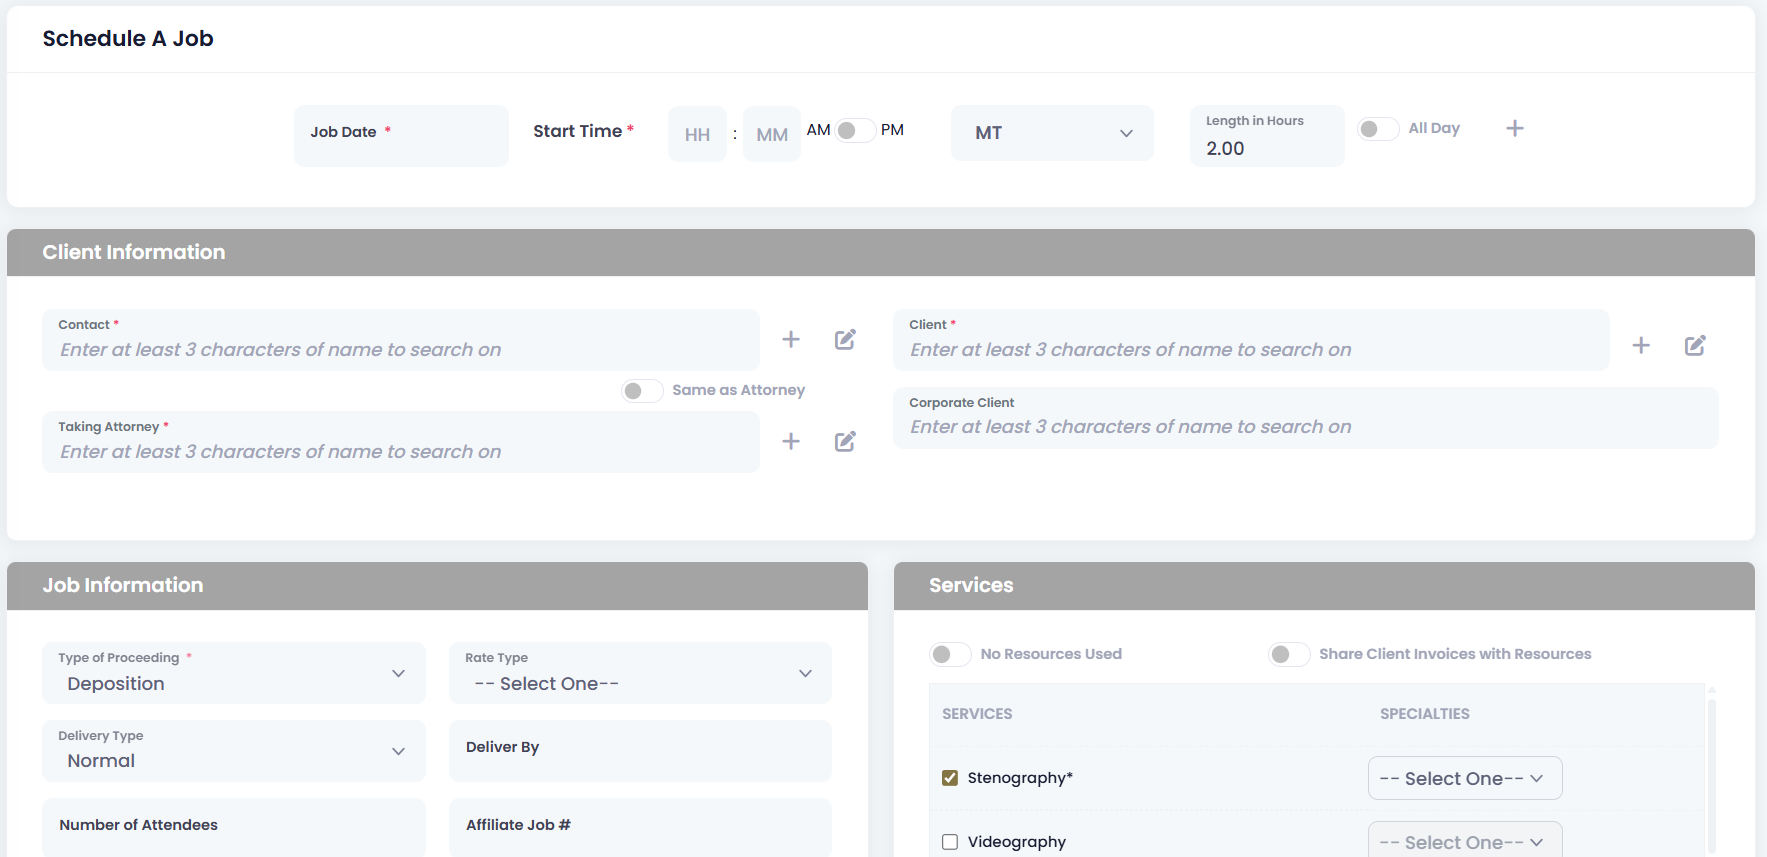
Clicking on the button or selecting a division will take you to the "Schedule a Job" page. You will enter all details on the job, similar to in Solaria. To create a repeating job, click on the + icon to the right of the date/time fields.
Other ways you can create jobs:
1. You can copy an existing job from the job details page by clicking on the Actions button and selecting Copy.
2. You can create a job from the job request page by clicking on the Actions button and selecting Convert to Job.
When saving a new job, it will notify the contact with the "Job Scheduled" notification.
When Solaria fetches in the job, it will fetch in any new clients, attorneys, contacts, cases, deponents and locations you created when entering the new job. It will then fetch in the new job and its tasks and show as a normal job as if it had been entered in Solaria. If a Zoom or Cameo room was selected for it, the fetch will also create the Zoom/Cameo meeting for it.
If you integrate with Stenexus, you will need to create the Stenexus room from the Job Details window in Solaria.
Canceling Jobs
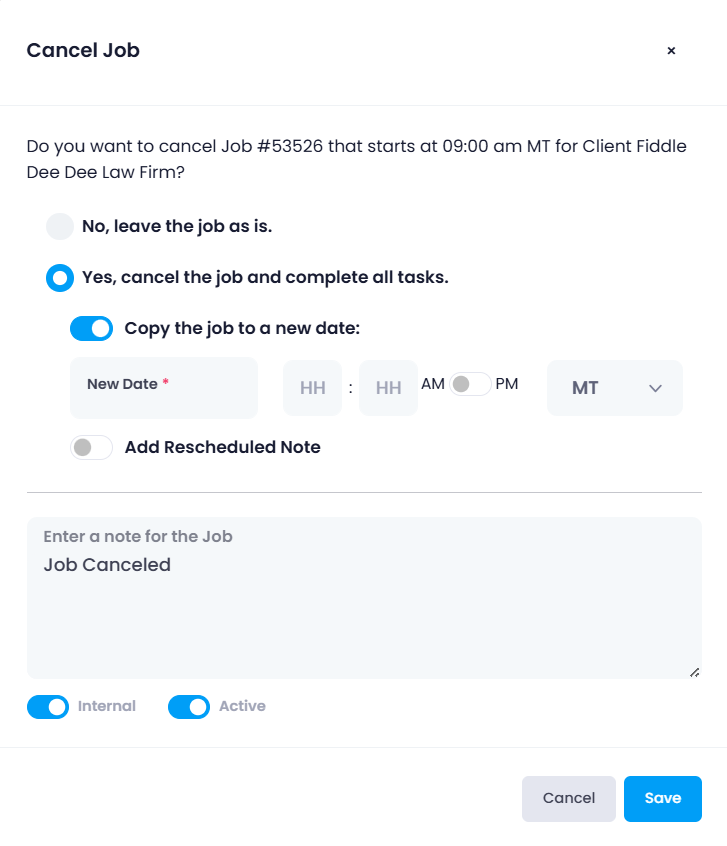
You can cancel existing jobs in ServiceLink if you have "Update" access to the "Jobs" privilege for your user role. Go to the job details for a job you want to cancel. Click on the Actions button and select Cancel. You will see the following window, allowing you to cancel a job, reschedule it, if desired, and enter a note for it.
Note: Billed cancellations are not available in ServiceLink at this time.
 Jobs can also be canceled from the Job List page.
1. Find the jobs you want to cancel, then click on the Actions button and select Cancel Jobs. The list will show checkboxes in front of each job.
2. Check each job you want to cancel.
3. Click on Cancel Selected... The above window will display to cancel the selected jobs. If more than one job is selected, it will not give you the option to reschedule the jobs.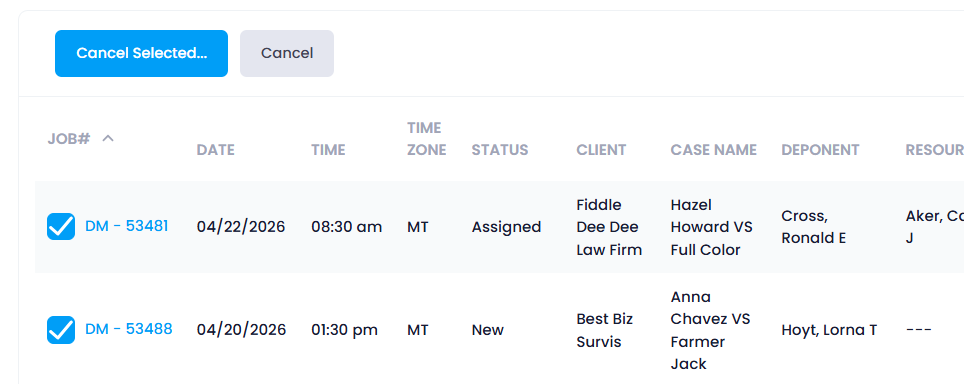
You can cancel job requests before they are converted to job. When viewing the job request, click on the Actions button and select Cancel.
Was this article helpful?
That’s Great!
Thank you for your feedback
Sorry! We couldn't be helpful
Thank you for your feedback
Feedback sent
We appreciate your effort and will try to fix the article